
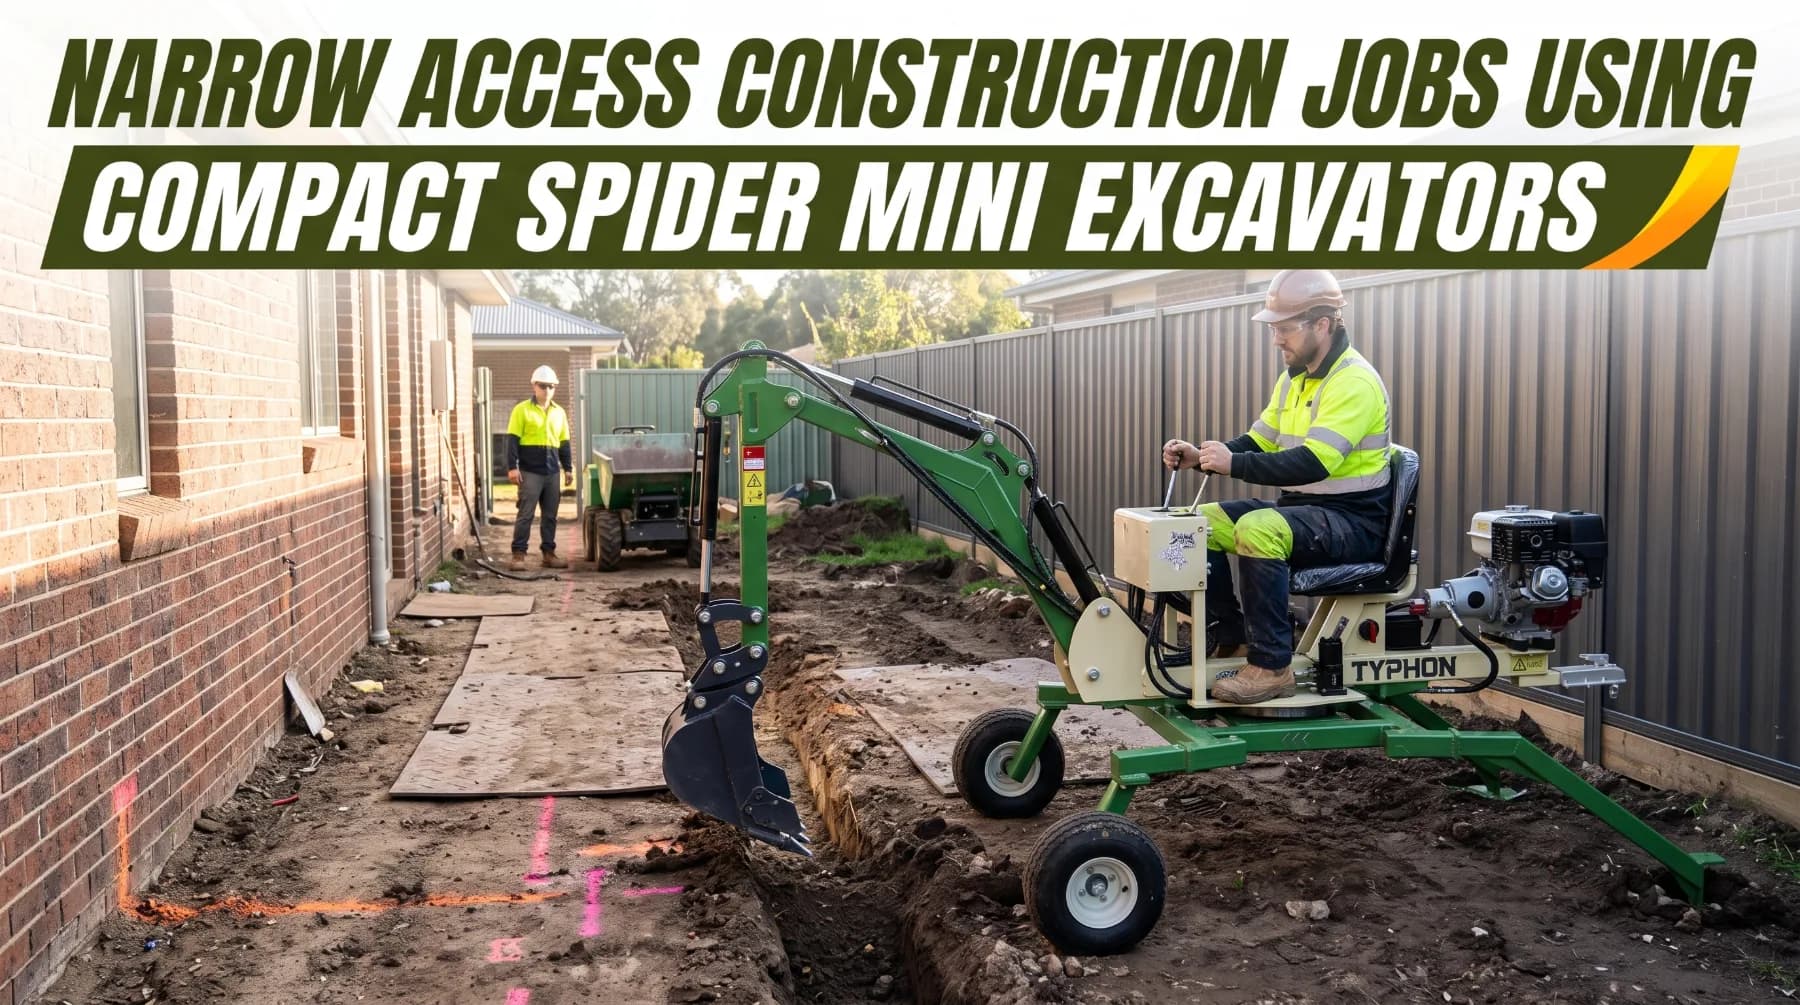
Narrow Access Construction Jobs Using Compact Spider Mini Excavators
Read our latest editorial analysis: . Expert heavy machinery commentary, industry developments, and operator advice.
Representative machinery image from the Machinery.org media library.
Narrow Access Construction Jobs Using Compact Spider Mini Excavators
Some of the most demanding excavation jobs happen in the smallest spaces. A homeowner needs a new drainage line along a side yard only a few feet wide. A contractor must dig footings for an extension in a walled courtyard. A utility crew has to reach a service connection behind a row of townhouses. Another job calls for a pool, retaining wall, or foundation repair in a backyard reached only through a garden gate. On sites like these, conventional excavators often cannot get through the entrance. Even when they can, they may not have room to set up and work.
Compact spider mini excavators are built for these conditions. Their narrow transport configuration lets them pass through tight openings. Their adjustable support legs let them set up on uneven ground. Their articulated design lets them dig in confined areas with a level of control that larger machines cannot match. For contractors, landscapers, and utility crews, that means mechanized excavation where hand digging was once the only option.
A compact machine does not make a tight site safe on its own. Narrow access jobs bring walls, foundations, windows, pipes, fences, and people into close range of the boom and bucket. Spoil has nowhere obvious to go. Support points must be chosen with care. A single uncontrolled swing can crack a window, strike a gas meter, or injure a worker standing just outside the operator's view.
Excavation in Restricted Areas
A compact spider mini excavator can dig effectively in confined spaces only when its reach and operating range suit the task. Before excavation begins, confirm the machine can reach the required depth, width, and length of the dig from stable positions. Check that it can do this without working at the edge of its limits or extending support legs beyond their permitted range.
Protect the machine's own support. Never dig beneath or immediately beside a support leg in a way that removes its bearing surface. As the excavation advances, confirm every leg remains on solid, undisturbed ground.
Protect nearby foundations and ground as well. Excavating beside a building can undermine footings, cause settlement, or crack slabs and walls. Never dig below or alongside a foundation without first assessing its depth, its condition, the soil conditions, and the excavation method the project permits. Some jobs call for engineered shoring, underpinning, or digging in short sections. Follow the project plan and any engineering requirements exactly.
Utilities require careful attention in restricted areas, where service lines often converge near buildings. Complete the required utility locating process before digging, such as contacting 811 in the United States. Arrange private locating where privately owned lines may be present. Expose marked lines using approved methods such as hand digging or vacuum excavation before mechanized digging continues near them.
Keep workers clear of the bucket at all times. In confined spaces, crew members are often tempted to stand close to the excavation to check depth, guide the operator, or clear debris. Establish an exclusion zone around the bucket's full working range. Workers should only approach the excavation after the operator has stopped all movement, lowered the bucket, and confirmed it is safe.
Stop and reassess if the excavation walls begin to crack, slough, or collapse, or if water enters the dig. Follow site requirements for trench and excavation protection, and keep workers out of any excavation that has not been assessed as safe.
Key takeaway: Confirm the machine's reach and digging range suit the task before starting. Plan a sequence that limits repositioning, never undermine support legs or foundations, and keep workers clear of the bucket throughout excavation.
Positioning Around Buildings
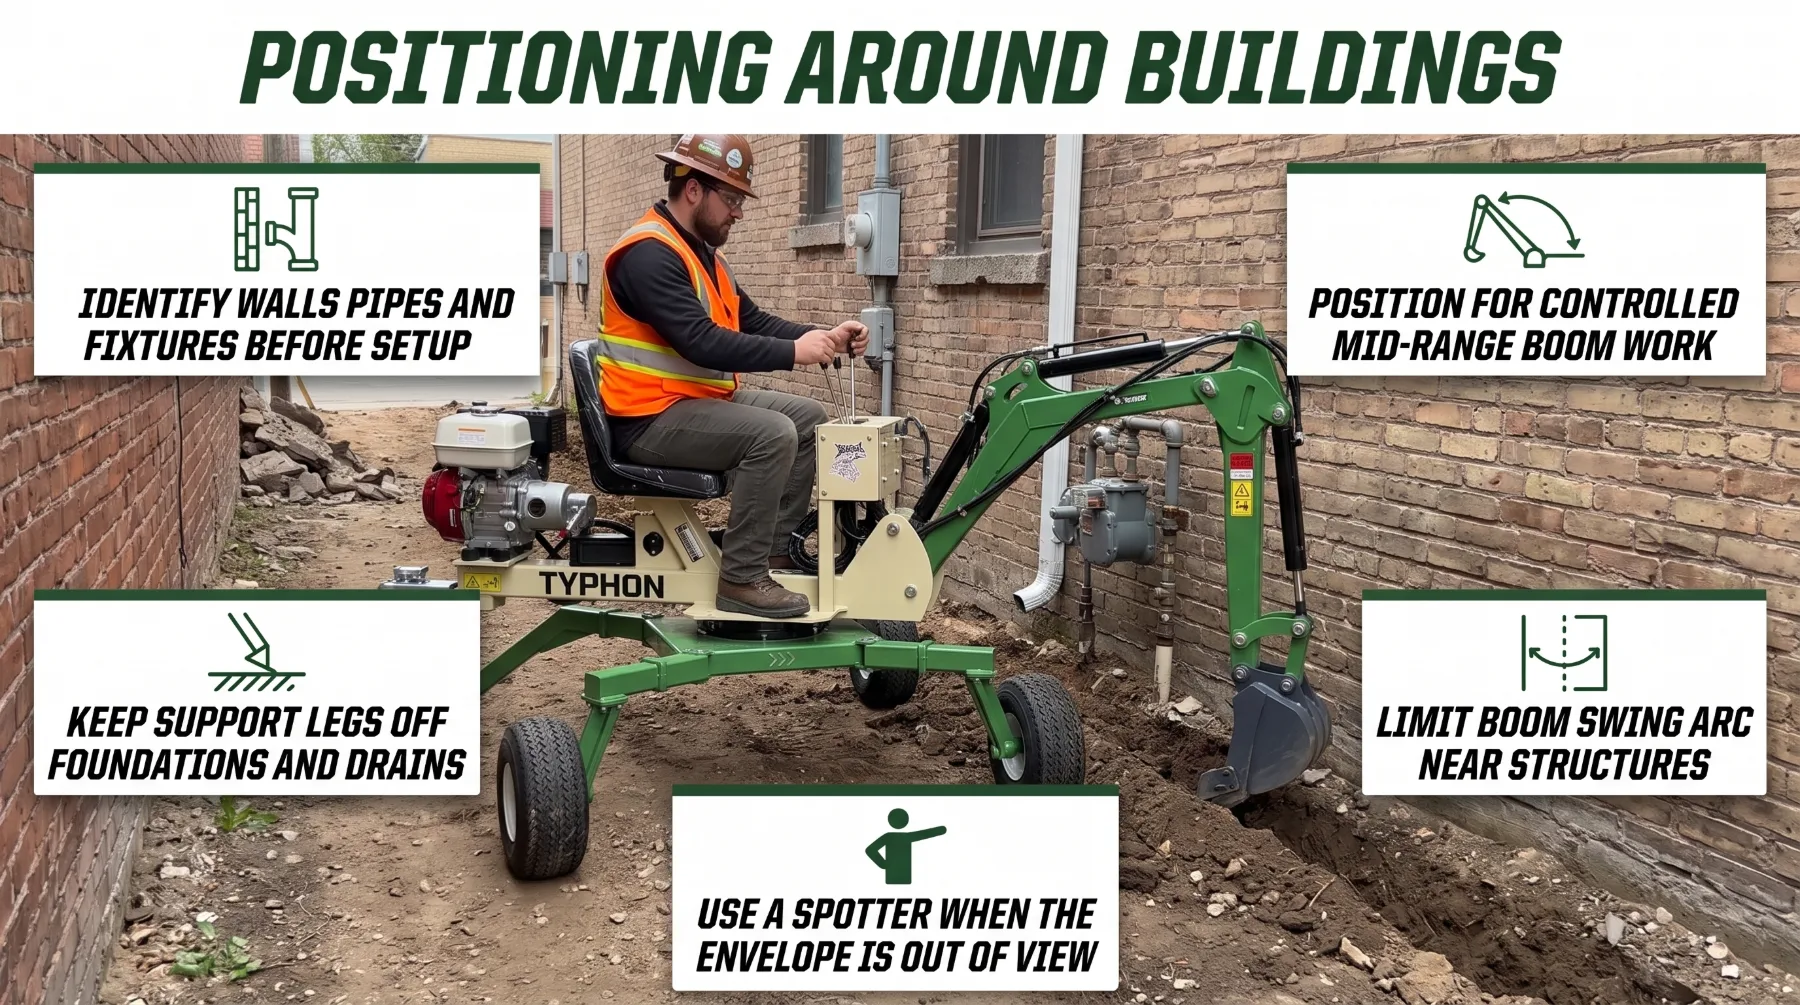
Narrow access work usually means working close to structures. Every movement of the boom, arm, bucket, and support legs happens within reach of walls, foundations, windows, doors, pipes, and fixtures. Careful positioning and controlled movement are what separate a clean job from costly damage.
Before setting up, identify every vulnerable feature within the machine's working range:
Walls and facades: Brick, stucco, siding, and stone can crack or chip on contact.
Foundations and footings: Excavation too close to a foundation can undermine it, and machine contact can damage exposed concrete.
Windows and glass doors: These are easily broken by a swinging bucket, a dropped load, or thrown debris.
Pipes and conduits: Gas meters, water lines, downspouts, electrical conduits, and drainage pipes often run along building walls.
Utility fixtures: Electric meters, air conditioning units, cable boxes, and outdoor lighting are often mounted at bucket height.
Overhead features: Eaves, gutters, balconies, and overhead service lines can sit within reach of a raised boom.
Mark these features clearly and brief the crew on them before work begins. Where practical, protect them with temporary barriers, plywood shields, or padding.
Position the machine so the planned work falls comfortably within its operating range. Setting up too far from the excavation forces the operator to work at full reach, which reduces control and stability. Setting up too close can leave no room for the boom to fold or the bucket to curl without contacting the structure. Aim for a position that allows controlled, mid-range movements for most of the digging.
Support leg placement matters near buildings. Keep legs off foundation edges, window wells, drainage grates, and fragile paving. Place them on firm ground that will not settle or shift toward the structure as excavation progresses.
Use a spotter when the operator cannot see the full machine envelope. The spotter should stand in a safe position outside the machine's swing radius and support leg area, stay visible to the operator, and use hand signals or radio calls agreed before work starts. The operator should stop immediately if the spotter moves out of view or gives an unclear signal.
Key takeaway: Identify and protect walls, foundations, windows, pipes, and fixtures before setup. Position the machine for controlled mid-range work, limit boom swing near structures, and use a spotter whenever the operator cannot see the full machine envelope.
Material Removal and Spoil Placement
On narrow access jobs, moving the soil out can be harder than digging it. Spoils add up quickly, storage space is limited, and the only route off site may be the same path the machine used to get in. Without a plan, excavated material can block access, overload excavation edges, cover utility markings, or pile against buildings and fences.
Keep stockpile height and size within safe limits. Tall, steep piles in confined areas can collapse onto workers or roll toward structures. Spread spoil where space allows, or arrange more frequent removal.
Plan for backfill where the project requires it. If excavated material will be reused, separate it from unsuitable material and store it where it can be returned to the excavation efficiently. If imported fill is needed, plan its delivery route and storage alongside the spoil removal plan so the two do not compete for the same limited space.
Coordinate every machine movement in shared spaces. The excavator, the carrier, and workers on foot often operate within a few feet of one another. Agree on communication methods before work starts, define who moves when, and keep workers outside the travel and loading areas while machines operate.
Key takeaway: Plan the spoil removal route and method before digging. Store temporary stockpiles on stable ground away from excavation edges, walls, access routes, and drainage, and never let spoil block access or create a hazard for nearby workers.
Attachment Size and Control
The attachment does the work, and in a confined space its size and handling make a direct difference to productivity and safety. Choose buckets and attachments that are approved for the machine and suited to the task.
Every attachment must match the machine's mounting system, hydraulic requirements, and rated capacity. Confirm compatibility in the manufacturer's documentation before installation. An unapproved attachment can overload the machine, affect stability, and damage hydraulic components.
In tight spaces, a smaller bucket often delivers better overall productivity. It allows more controlled, accurate digging, reduces the risk of contact with structures, and keeps each load within the machine's capacity.
Account for the attachment's weight in every lift. Heavier attachments reduce the capacity available for material, particularly at full reach. Use the manufacturer's load charts for the exact configuration.
Use controlled movements to prevent the bucket from striking nearby structures or utilities. Smooth, deliberate inputs give the operator time to react and stop. Avoid fast swings, abrupt curls, and sudden boom drops. Never use the bucket to push against walls, pry at foundations, or knock down structures unless the machine and attachment are specifically designed for that task.
Before every installation, check that the quick coupler or mounting pins are clean, undamaged, and fully locked. Confirm hydraulic connections are secure and leak-free. Test the attachment through its full range of movement in a clear area before working near structures. An attachment that is not fully locked can detach and cause serious injury.
Key takeaway: Select buckets and attachments approved for the machine and suited to the task. Weigh the productivity of a larger bucket against load, clearance, and visibility, and use smooth, controlled movements to keep the bucket clear of structures and utilities.
Access Planning and Clearance
Every narrow access job starts with one question: can the machine reach the work area and operate once it gets there? Answer it accurately before mobilizing. You will avoid property damage, wasted trips, and the costly surprise of a machine that stops at the gate.
Walk the full route from the unloading point to the excavation area. Measure every restriction along the way, not just the main entrance. Common pinch points include:
Gates and fence openings: Measure the clear opening between posts. Check whether hinges, latches, or gate hardware reduce the usable width.
Passageways and side yards: Look for narrowing at downspouts, utility meters, air conditioning units, window wells, hose bibs, and steps.
Overhead restrictions: Check eaves, gutters, balconies, archways, low branches, decks, and overhead lines along the route and in the work area.
Ground transitions: Note curbs, steps, retaining walls, slopes, soft lawns, and changes in surface level that affect safe travel.
Turning areas: Identify every point where the machine must change direction, and confirm there is room to do so.
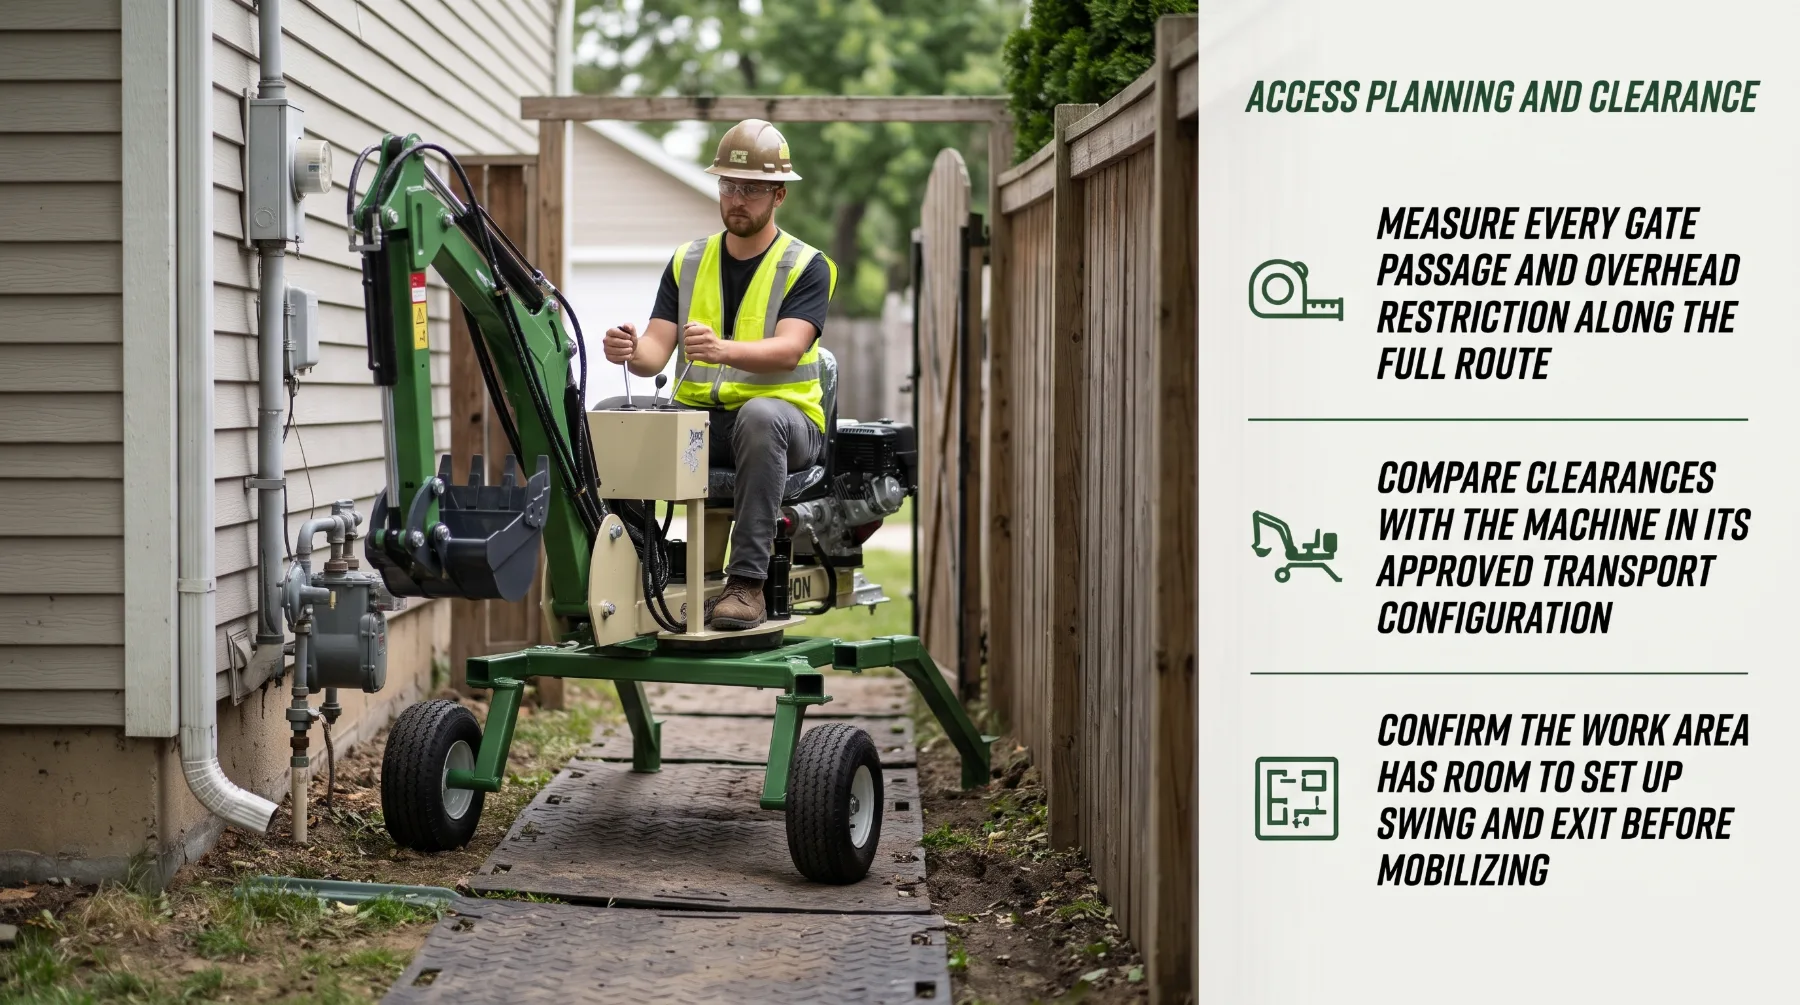
Allow working clearance on each side rather than planning for a machine that barely fits. Tight clearances leave no margin for steering corrections, uneven ground, or limited visibility, and they raise the risk of scraping walls, fences, and fixtures.
Access also includes the work area itself. A machine that fits through the entrance still needs space to deploy its legs, establish stable support, and swing its boom through the planned digging range. Mark where the machine will set up and confirm that the full working footprint fits. Then check that the machine can exit the site when the job is complete, which may be harder once the excavation and spoil piles are in place.
Protect the surfaces along the route. Lawns, pavers, decorative stone, and finished patios can be damaged by machine travel. Use approved ground protection mats where needed, and confirm the surface can support the machine's weight, particularly over buried tanks, drainage structures, or thin paving.
Key takeaway: Measure the narrowest point along the entire route. Compare it with the machine's approved transport configuration, including the boom, bucket, and support legs. Then confirm the work area has room to set up, swing, and exit.
Inspection and Safe Operation
A compact spider mini excavator working in a confined space has little margin for equipment problems. A leaking hose, worn pin, or unreliable control can cause sudden movement close to a building or a worker. A thorough inspection before every shift, and disciplined operation throughout the job, keep work controlled and predictable.
Inspect the machine before work with it parked on firm, level ground, the attachment lowered, the engine off, and the key removed:
Support system: Check legs, pads, and leg cylinders for cracks, bends, weld damage, leaks, and loose fasteners. Confirm leg adjustment functions move smoothly and hold position.
Hydraulic lines: Inspect hoses, fittings, and cylinders for leaks, abrasion, cracks, bulges, and loose connections. Use a piece of cardboard rather than your hand to check for leaks, since pressurized fluid can penetrate skin and cause serious injury.
Pins and bushings: Look for wear, excessive play, missing retainers, and signs of poor lubrication. Grease pivot points according to the manufacturer's schedule.
Controls: Test every function, including travel, leg positioning, leveling, boom, arm, bucket, and swing. Confirm controls return to neutral and that the emergency stop and safety interlocks work as intended.
Attachment security: Confirm the attachment is approved, correctly mounted, and fully locked, and inspect cutting edges, teeth, and couplers.
Tracks or wheels: Check for damage, wear, and correct tension or inflation.
Safety equipment: Confirm the seat belt or operator restraint functions correctly, and check lights, alarms, and warning decals.
Report any defect that affects safe operation, and keep the machine out of service until it has been corrected. Never operate a machine with a leaking cylinder, damaged leg, or unreliable control in a confined space.
Maintain stable support throughout excavation. Confirm the machine is within its permitted leveling and support range before digging, and recheck support conditions as work progresses. Ground can settle, water can soften soil, and excavation can change the loads on nearby support points.
Follow the machine's operating limits at all times. Stay within rated lifting capacity, permitted slope and leveling limits, and approved working range. In confined spaces, crews may be tempted to stretch the machine's reach to avoid repositioning. That shortcut reduces stability and raises the risk of contact with structures. Repositioning is always the better choice.
Keep a clear exclusion zone around the boom, bucket, and support legs. Brief everyone on site about the zone before work begins, and stop all movement immediately if anyone enters it.
Training ties these practices together. Operators should be trained on the specific spider excavator model, including its leg positioning, leveling, controls, and limits, before working in restricted areas. Familiarization matters even for experienced operators, since controls and support systems differ between machines.
Key takeaway: Inspect the support system, hydraulic lines, pins, controls, and attachment security before every shift. Maintain stable support and stay within the machine's operating limits, and stop work whenever ground conditions, access, or nearby hazards change.
Conclusion
Compact spider mini excavators can help complete construction work in narrow areas when access, support, reach, and spoil handling are planned carefully. Measuring every restriction along the route and comparing it with the machine's approved transport configuration, including the boom, bucket, and support legs, confirms that the excavator can reach the work and set up once it arrives. Identifying walls, foundations, windows, and pipes, and controlling boom swing with the help of a spotter, protects the structures that surround tight jobsites. A planned digging sequence limits repositioning, preserves stable support, and keeps excavation clear of foundations and utilities. A defined spoil removal route and stable stockpile locations keep access open and excavation edges safe. Approved attachments sized for the space support accurate, controlled digging, while thorough inspections and disciplined operation keep the machine dependable throughout the job. When you plan each phase in advance and work within the machine's limits, safe positioning and controlled excavation protect the machine, the operator, and every structure around the site.
FAQs
Can a spider mini excavator enter a narrow backyard?
It may, if the entrance and route provide adequate clearance for the machine in its approved transport configuration. Measure the narrowest gate, passage, or gap along the route, and compare it with the machine's full travel dimensions, including the bucket, boom, and folded support legs. Allow working clearance on each side, check overhead restrictions, and confirm the backyard has enough space to deploy the legs, swing the boom, and exit when the job is complete.
Can excavation take place beside a building foundation?
Only after assessing foundation conditions, soil stability, utilities, and the permitted excavation method. Digging beside a foundation can undermine footings and cause settlement or cracking. Confirm the foundation's depth and condition, complete the utility locating process, and follow the project plan and any engineering requirements, which may include digging in short sections, shoring, or underpinning.
How can workers avoid contact with the machine?
Keep a clear exclusion area around the boom, bucket, and support legs, and brief everyone on site about it before work begins. Use a spotter when visibility is limited, and make sure the spotter stays outside the swing radius and in full view of the operator. Workers should approach the excavation only after the operator has stopped all movement, lowered the bucket, and confirmed it is safe.
What should be planned before digging?
Access, utility locations, machine support, excavation sequence, and spoil removal should all be established. Confirm the route and work area clearances, complete required utility locating, and identify stable support points. Plan a digging sequence that limits repositioning, and set a spoil removal route and storage location that keeps access clear and excavation edges safe. Select an approved attachment sized for the task and the space.

Reader feedback
Have any comments, corrections, or suggestions for this blog post? Reach out to our support team.
Report feedback